Sunday, May 12, 2013

Cribs.

It is quite possible that nobody actually cares about this mini-series we're getting ready to begin.  But nobody put a gun to your head and said "GO READ NICK AND SARAH'S BLOG!" so I'm going to assume you're here by choice.  If that's not the case, seems you have bigger problems to deal with at this point.

One of the only parts of pregnancy that I've enjoyed so far is planning for the nursery.  Up until my 18 week ultrasound, I had it in my head that P-Nut was in fact, a chick.  When we were told by the doctor that there was definite "outdoor plumbing," I was shocked.  Elated...thankful...excited...but shocked.  See, the nursery for this new Troutman was pretty well planned out in my noggin by that point.  And the design was for a girl.

Womp womp.

(Dear unborn son, should you ever stumble upon this blog one day: I am in no way disappointed that you are a boy.  You're going to be an awesome boy.  Whatever disappointment I felt was that my killer girl nursery ideas were going to have to be put on hold.  I'm crazy excited that you are a dude.  Love, Mom)

A couple months ago, when I was laid up with the winning combo of morning sickness and a sinus infection, I started to put some of my new "this baby is a boy" thoughts to (virtual) paper.  This is part one of a multi-part series on how we pimp out the new nursery.

Part One: Form Follows Function

The first thing I always consider in design is, "what does the space need to DO?"  We have a guest bedroom and a rather large master bedroom.  Four things need to happen in those two rooms.

1) Husbo and I need to sleep.
2) The baby needs to have a place to sleep.
3) We need to retain an office function with a desk and computer.
4) We'd like to keep a place for guests to sleep.

Pre-baby, we had the master bedroom and a guest bedroom/office combo.  

One half of a very messy guest bedroom, after all the lovely donations of mama friends.

The other half of the guest room, complete with Nick's old desk and chair.

The guest room never got the full design attention it deserved b/c it was always a hodge podge mix of hand-me-down furniture and a place to store extra "stuff."  Before I was married, it was also Bryna's room and later, Steph's.  So I never did much to fit it out.  Knowing it had the potential of always being a future baby's room, I never bothered spending any money in there.

Once I got knocked up...it was time to get real.

The guest room is pretty large so I felt like keeping a double bed in there with the nursery was doable.  That just meant the office function needed to find it's way into the master bedroom somehow.  

For those who have never been to our house, the master bedroom is about 21' long by 14' wide.  We'd always dedicated half the room to having a mini-living room in it with a couch, coffee table, TV and bookcase. 

Whaddup giant tube TV?
When you work together like Nick and I do, it's actually been a blessing to our marriage to have a 2nd hangout area in our home.  Sometimes you just need a bit of "me" time.  

Enter function #5 we decided to prioritize in the Great Nursery Shuffle: retain a 2nd TV/sitting area.

There was going to be no way to put a desk in the current layout..  First of all, the TV is the size of Mongolia.  The coffee table is 3' x 3' and required its own zip code.   With my saltines, gingerale and antibiotics handy, I broke out a quick space plan for that half of the room.

Couch stays, but we look at a desk/bookcase combo and try to find a more narrow coffee table.

For anyone thinking, "well I can't plan my space like that b/c I don't have that type of program." Fear not.  There are butt loads of free space planning programs online that you can try.  And they're quite simple to use.  This one is rather popular.

I did want to take it a step farther because when selling an idea to him, it's always nice to let Nick visualize what I'm seeing in my head.   So I threw the plan into 3D.


For those of you thinking "Well maybe I can space plan but I can't do that!"  Well...that might be true.  But I got a degree in interior design and you didn't.  I'd never expect to magically obtain the ability to do someone's taxes or diagnose strep throat.  But I'm not a CPA or doctor, now am I?

I had no idea what type of coffee table I'd find, so I just threw in something narrow as a placeholder.  And what you couldn't see in plan view was a flat screen TV on the wall.  I thought just maybe...by the time we sold a bunch of other stuff on Craiglist, we could find a way to afford a small TV for the wall.

I did have the Expedit unit in mind for the desk/bookcase combo.  So that was shown in 3D...but the rest was all a dream.  Once we sold most of the old stuff on Craigslist...it was time to start looking.

We picked up the desk unit a few weeks back when I was in Charlotte for Mandi's bachelorette weekend.   Then, my sister gave us a gift card to the Habitat Reuse store last summer and I found this beauty:

Great shape, solid wood, brass tipped legs.

Small tear in the leather upholstery but for the price (FREE!), it was perfect.
What wasn't working for me was that "hey I'm a professional business person" black vinyl seat.  My butt deserves more fun than that.  So I ordered a yard sample of fabric from one of my reps at work (yes for free...another perk of the job).

Hello, lova.
Hopefully everyone knows how to recover a seat cushion but quickly...

Remove the screws holding the seat down.

Center the fabric pattern (if applicable) and staple away.
Reattach seat w/ original screws.

Voila!

Then I went on a hunt for the coffee table.  As luck would have it, I found a great solid wood piece on Etsy...and her shop is located a mere 4 blocks from our house.

Midcentury lines with a small drawer for junk...$100.
 Put it all together and...

Ignore the cords.  We literally just hung that an hour ago and haven't had time to deal with them yet.

So here's the list after the last few weeks' progress:

1) Retain a place for Husbo and I to sleep.
2) Create a space for the baby to sleep.
3) Retain an office function with a desk and computer.
4) Keep a place for guests to sleep.
5) Retain a 2nd TV/sitting area.

It may look impressive from a "look how much we've checked off" perspective...


...but there's so much to be done.  The nursery ideas still aren't 100% finalized but I think I've finally narrowed down the perfect paint color.  Which is croosh (that's the phonetic abbreviation for "crucial.")

Hopefully I'll have an update soon.

Troutman, out!

Sunday, March 31, 2013

Easter: a Few Thoughts.

If anyone has been even remotely interested in the March Madness of late, you're familiar with Florida Gulf Coast University.  They've since lost in the pursuit of the Elite 8 but their exciting journey to be named one of the 16 best teams this year was certainly exciting.

And some of y'all may know Nick and I are State fans.  You didn't?  Stop reading this blog.  Come to my house.  We need to talk.

In any case, I'm pretty sure I went hoarse from yelling from the rooftops about the 30 for 30 Film that aired a couple weeks back that chronicled our 1983 Championship basketball team.

I'm going to cry just looking at this picture.

What's the common factor?  

They were underdogs.  

I spent a lot of time thinking about why people love the underdog so much.  Why do we pour our hearts into people or teams that we don't know and may never know just because our desire for them to succeed is so great?  Is it because everyone else counted them out?  Is it because they seemingly have no skill or ability to overcome the task before them, but in spite of logic, we WANT to believe that they can do it?  I really don't know.  It's probably a combination of many things.

But the question lingered with me.  The more Facebook posts I saw rooting for the FGCU Azul (that's a mascot?) and the more folks that told me how they too bawled like a child at the film begged my brain the question: why do people care?

On this Easter morning, Nick and I are celebrating our risen Savior.  His body was broken and bloodied beyond human semblance, hung on a cross, and then sealed in a tomb.  For three days, the world mourned.  Defeat seemed more than imminent, it was certain.  The lowly carpenter from Nazareth was not God as he claimed, but merely a man.  He didn't have the skill or ability needed to save mankind.  He was ordinary like everyone else.

But on this beautiful morning, we celebrate that it was not the end of the story.  With the stone pushed aside and the tomb found empty, we rejoice.  

Victory.

There is no greater triumph in the history of the world than what happened on this day.  And when God sent his son in the form of a helpless baby, to rely on the care of a teenage girl, the world would tell you...he was an underdog.  As he spent his life dining with prostitutes and tax collectors, loving the lame and befriending the outcast, the world would tell you...he was an underdog.  He didn't have the skills they thought he needed.  He didn't "get it."  

But my favorite part of the underdog story is the intangible.  It's the part of the story that you just can't explain.  There's no reason it should work...but yet every part of it works deep in your soul.  

Maybe it's a far-fetched metaphor, but I believe that God loves the underdog.  If he didn't, why would he have packed the Bible full of them?   As the wonderful Jimmy V says, "Every day, ordinary people do extraordinary things."  I think that's true.  When submitting our life to God, he will use us in ways we never imagined.  Abraham, Jacob, Joseph, Rahab, Moses...just to name a few.  You can add your name to the list.  

When I opened my eyes this morning, I began humming one of my favorite songs we sing at church.  I hope we'll sing it at church later tonight but I needed to hear it this morning.  I googled it and found a random version by some lady I've never heard of...but she's pretty good.  


Man, what a good day. 

P.S.  Nick and I are attending the 5pm service at Vintage today.   If anyone would like to join us...holla atcha girl.


Sunday, January 6, 2013

Hey, Remember When We Had a Blog?

Sup, boos?

I can't tell you how many times Husbo or I have said to each other, "we should blog about that."  Oh, the intentions are good but when it comes to loading up pictures, typing up our thoughts and making sure it strikes that infamous balance of humor and content...well, the bag of Oreos and the couch normally win out.

But even though I think New Year's Resolutions are dumb, I suppose now is as good a time as ever to get back into it.  And since we undertook a DIY project that a lot of people requested more deets about, the "comeback" blog topic seemed clear: How we turned our fugly laminate countertops into high-class concrete beauties.

Pssst, here's a secret: we didn't reinvent the wheel.

Through the magic world of Pinterest, I stumbled upon this a few months ago when my mom had asked that we redo her outdoor bar for a Christmas present.

It's hard to hate it when you've got an adorable cat as your Vanna White.
My first thought was some type of tile mosaic top, but it was a bit too traditional for my taste.  I'd always loved the idea of concrete counters but everything I knew about making them was they're time consuming, extremely heavy and require some work area.  None of those items sounded like a party to me.  So when I stumbled upon the Kara Paslay tutorial for essentially skim coating your existing counter...I was sold.  

Since they did such a good job going through the steps, I'll walk you through the few things we may have done differently and load you up with pictures.  From an iPhone.  B/c we still don't own a real camera.  (Judge not, Nikon elitists.) 

Preparation: 
As they mention, whatever surface you're looking to resurface, the subsurface needs to be roughed up to "grip" the concrete.  For the bar, we removed the padded border to expose the laminate counter.  Once we did that, we were concerned with how thin the top was.  We had planned on sanding the top down, but visually, it was going to look too dinky.  So we went to Lowes and had them cut a piece of good exterior-grade plywood to add to the top to beef it up.

Husbo squirting the Liquid Nails to the existing top.

Plywood added, clamped to keep it in place.

Screwing new plywood into place.
We also added a piece of 1x2 trim to the front (you'll see it in a picture in a minute) to give the front a nice smooth finish.  We were mildly concerned if the two surfaces weren't perfectly flush, there'd be an odd line or gap at the front.  No bueno.

When it came to our kitchen counters, we didn't have the option (nor did we need) to add plywood on top.  The edges are bullnosed and there was a backsplash that would have been a nightmare to work the wood around.  
You're gross, old counter.  I hate you.
So to get these puppies ready, Husbo took a palm sander and went to town.  But let me back up a second.  If you're getting ready to do what we did, you ought to take some of the same precautions.  

1) Unload the kitchen.  Take everything out of there.  Pictures, appliances, doodads and chotchkies.  
2) Cover the major appliances that can't be removed (the refrigerator, range, etc.)


3) Cover any registers feeding the room.  With all that dust floating around, you'd hate to get it sucked up in the HVAC and blown out into your bedroom.  
4) We had one door we could close and the other opening we taped up a giant sheet.  Just seal off the room in whatever way you can.
5) Wear a face mask.  Or make one and play cops and robbers.

There's a new sheriff in town.
Ok...NOW you can go to town.  Let me just tell you...if cleaning up the giant mess that will ensue makes you faint at heart, don't do this project.  I don't see anyway of avoiding how to keep your kitchen from looking like a bunch of Cuban gangsters had a giant cocaine party in your house.  

I swear Dexter doesn't do crack.  He's just fat and lazy.
Concrete:
When it comes to obtaining Ardex in the RDU area, our local supplier is Fishman Flooring Solutions.  They are out on Corporation Parkway and they're awesome.  They are actually a vendor of mine through work but you can walk in and buy right off the shelf.   They're also Wolfpack fans so you know they're good folk.


The directions on the bag tell you when making smaller batches, it's about 2 parts concrete to 1 part water.  We found that it came closer to 1 to 1.  Ultimately, you want the consistency to be like pancake batter.  Not too thick, not too thin.  


Don't make too much at once.  You can always make more.  If you make too big a batch, it will begin to thicken up and become harder to work with.  Luckily, Husbo and I were able to work at the same time (save for the times I was snapping pictures) so that we could move quickly.

Notice the trim piece we added to the front here.

We did two thin coats at mom's bar and on our kitchen counters.  It took about 2 hours for the first coat to dry so we could trowel on the 2nd.  

Use your finger to help smooth/mold any hard areas like the bullnose curve or where the backsplash meets the counter.

Give it a light hand sanding between coats and wipe with a damp cloth to remove the dust.

Drying.  Give it one more light sand once you're done to smooth out any rough spots.

Sealing: 

Once the concrete is fully dry (we waited over night to be sure), it's time to seal.  We didn't use the sealer Kara Paslay recommended due to not being able to find it. I did some research and found a water based sealer that would work on porous concrete and picked it up at Lowes.

Make sure it's water based if you're going to put it on a surface where food is prepared!
Then it's as simple as brushing on the sealer.  We put four coats on the counter to make sure it was really sealed well.  It took about 45 minutes to an hour between coats.  Luckily, we had gotten into watching Downton Abbey so we had plenty to do while we waited.  

Look at that lovely semi-gloss shine.
Even after the last coat was dry to the touch, to be safe, we let it cure another 12 hours or so before putting anything back on it.  Better safe than sorry, I suppose. 

We like the "hand troweled" look.  You can always try to smooth it out a bit more if that's not your jam.

Overall, we're really pleased with how it turned out.  We rent our house and so a lot of folks have asked if our landlord cares.  Well our landlord doesn't know.  But he also isn't aware of how many bedrooms this place has so I highly doubt he'll remember what the counters look like.  Plus, it's a giant upgrade in our opinion.  


When the counter gets wet, it gets dark in those areas, but it dries no problem.  We've had the ones in our kitchen for just over a week and have made food, spilled things, etc and they are holding up well.  We'll let you know if that changes.

Well, maybe.  We all know how good we are at keeping up with this thing.

Saturday, September 22, 2012

Extreme Makeover: Dresser Edition

Easily his best picture.

Ever since we lost our dream house, I've had the insatiable desire to change things around our rented abode. Apparently, my designer brain was so focused on the idea of a blank slate, I found myself anxiously pacing around our house with creative energy bubbling up inside...and no outlet to relieve me.  Something had to be done.  I had to relieve myself.

I'm pausing so you can appreciate the wording of that sentence.

I'd had an idea for a dresser treatment that I'd seen that soon developed into a small obsession for me.  I'd told Husbo about it no less than 15 times over the past month and for some reason, my brain did not connect the fact that I had both a dresser that was begging for a makeover AND creative energy for days.  One afternoon, while visiting the new West Elm store in Durham, I saw a dresser there that was at least a 2nd cousin to the dresser I'd been dreaming of.   I promptly showed Husbo (as if the first 15 times weren't enough) the idea that I was so enamored with and that genius of a man removed the stupid veil over my brain to suggest that perhaps we could just refinish our existing dresser.

He'd never been sexier to me than in that very moment.

Due to my complete lack of impatience, we had to get started immediately.  Enter: the black blob.

We've had a good run, old friend.

It's not horrible.  In fact, for many years, I loved it.  I got the dresser from my old Hroomate (not a typo), Bryna.  When she decided to get married and move to Japan, she decided not to pay the shipping required to bring this baby with her. Go figure.  When she was using it, it was a cool shade of avocado green (she'd gotten it second hand and gave it her own facelift).  When I inherited it, I went goth on it...and she got a fresh coat of black paint.  


Any good before picture has extra crap laying around.  You gotta get the full effect.


I lived with it like this for a good 4 years but as other things in our bedroom began to evolve, she was slowly becoming the odd woman out.   The mirror that sat on top was a Homegoods find from around the same era.  While the idea of it was pretty cool (the "shutters" close to create a faux window look), it was much too ornate for my increasingly simple taste.  Through the magic of Craigslist, I sold that heavy beast for 80 bones.  80 bones that would not only cover the cost of renovation, but leave me a little extra for new accessories.

So first, we removed all the hardware.

A woman without her jewelry.

Then, we borrowed some paint stripper from the original Handyman, my father-in-law.  Husbo brushed it on all of the drawer fronts, and we scraped.  We scraped a lot.  Apparently there were four coats of paint on those bad boys.  (Sidenote/warning: that stripper stuff is rather caustic.  We both wore gloves and made sure to protect all the surfaces around where we were working.)

Not gonna lie: this was a pretty nasty step.

 After a bulk of the paint was stripped, Husbo took on the task of sanding down the faces to a smooth finish.  With a palm sander, he used a rough grit sandpaper to knock off any other paint that was hanging on for dear life, and then went back over each of them with a fine grit paper to get a beautiful, smooth surface.

Ahh!  We're naked!

I gave a couple of the drawers a patching with a bit of stainable wood filler (b/c this piece is so old and had been banged up in some places.)  Once that was dried and sanded smooth, it was time to stain.


We picked a stain color that most closely matched our bed frame.  Might as well make it look intentional, right?  We used a minwax product that had a polyurethane sealer built in.  I try to be patient with things like this, but if I can cut out a step by buying a 2 for 1 product, I'm doing it.

After two thin coats, brushed on in the direction of the grain, we brought them into the guest room and let them cure for a couple days.  

I'm embarrassed to admit how many times I'd peek my head in to drool over them. 

So what about the body of the dresser?  Well luckily, we never had the intention of stripping/standing/staining that piece.  After the very long process of treating the flat, simple drawer fronts, we couldn't fathom how long and complicated doing that to the dresser would be.  Instead, it was going to get yet ANOTHER coat of paint.  

After a rough sand and wipe down, we started with an oil-based primer to give it some tooth.  (Note: you cannot paint acrylic paint over oil-based paint but you CAN paint it over oil-based primer.)

Sexy socks and shoes, honey.

While he did that, it had been a couple days, so I was going to finish off the drawers and prep the space for moving the piece back in.  I put the hardware back on (we bought a couple more knobs to replace the original handles that were on the center drawers) and then added a liner to the top row.  I'd had a yard of wallcovering from work that I'd wanted to do something with and thought it might be fun to line the insides of the drawers with it.

Here I am weighing the corners down to help the glue set up.   Tre chic.

One other task that had to be tended to was the wall BEHIND the dresser.  You see, when Nick and I were first married back in 2010, his band at the time went on a tour of the East coast for a week.  In my newleywed bliss, I thought it'd be fun to surprise him when he got back with a bedroom makeover that was more of a blend of our styles.  So I made pillows, I hung curtains, and I painted.  

Well confession time: even DIY energizer bunnies run out of steam.  We have a rather large master bedroom with tons of mouldings and trim, so I assessed the task before me and made a few executive decisions. One being, not to move the dresser or the mirror.  Besides weighing 4500 pounds and running the risk of it falling and trapping me underneath, it was after midnight on the day before he was going to return.   So I painted around it.
 
I ain't even ashamed.

So I needed to paint the wall.  I found the task rather amusing so it wasn't that big a deal.  Meanwhile, in dresser land and seven very thin coats of white paint later...(when you're painting white over black, even if you're using a primer, it take a while to get a complete full coverage)...we were done.

I apparently forgot to take a picture of that step so here's a filler pic:

Seven coats?!  Say whaaaa?
 
How many of you just skipped the rest of this blog to get to this point?  I hate when people don't show the before and after before I lose interest.  Let's skip ahead then:

 
BAM!

She's friggin' beautiful in my opinion.  We let the paint cure for at least 4 hours between coats and then a full 24 hours before bringing her back into our bedroom.  I really just put a few things on the top for this picture as I wanted it to be completely hardened and cured before messing anything up.  But oh...she was so worth the wait.   And here's a reminder of what we were dealing with before:


And then after:


The honeycomb mirror is from Ikea and I'd picked that up a couple months ago.  $14.99 Y'ALL.  I still need to find a new plant for the corner and I want to get a different laundry hamper now that I'm banning all black from our bedroom.  I've got a little cord management velcro I need to install to take care of that issue on the left but overall...a success.

And as far as the budget:

2 Paint Brushes:          $5
Primer:                      $10
Wood filler:            $3.50
Foam roller:           $6.50
Stain/Sealer:              $10
Quart of Paint:     $11.50
Honefoss Mirror:      $15

Grand Total: $61.50*

*Note: we had (2) $5 off coupons from Ace Hardware for joining their rewards program so I didn't count the tax on these purchases because it was mostly covered by discounts.

With the $80 I got from the mirror I sold off, the moral of this story is that we made $18.50 by doing this project.  Garth, that was a haiku!

Monday, September 17, 2012

Hambones Across America II

(Did you think we forgot about the blog?  Because we kinda did.)

Part Deux: The Mountain States 

After some major biscuit confusion at the Carson City Carls Jr. (aka Hardees), we hit the road. Destination: Salt Lake City. Have you ever driven across Nevada? Don't. There's nothing there. Highlights included Ethan wearing a Burger King crown (Yeah there's so little in Nevada that we ate at Burger King. It was not good.)...

That's KING Hambone, to you.

...and me pretending to be European - which consisted of tucking my t-shirt into my shorts. 

"Ja, hallo? Warum sind wir bei Burger King? Es gibt nichts in Nevada. Danke, Google Übersetzer!"

And have you ever wondered how many times Sirius XM could play Collective Soul's '93 hit "Shine" in a day? Because it's like 6. I'm not complaining.

Besides that, it was hour after hour of this:

It's a lot worse than this picture.

Ok, the best part about this drive was right after we crossed into Utah and reached the Bonneville Salt Flats State Park. Just a giant dried up salt lake bed. All kinds of land speed records were set here. You know those commercials where there's nothing around and a bunch of cars are driving in formations? Yeah that's Bonneville Salt Flats. Despite Carla getting up to 101 on the interstate, we felt it was necessary to drive on the Salt Flats and see how fast a VW CC with 4 people and a lot of luggage could go (Jeans McQueen hit 117). You don't feel like you're going super fast - you feel like you want a lot more control of the car, because driving on salt is weird.

That squealing you hear is not a tortured animal, but Sarah, who upon watching the video later does not recall making said noises.

We used up all our gas on the Salt Flats and wisely decided to push on to SLC. Except then the gas warning light came on. And there were no gas stations showing up on the GPS until... well, we got pretty worried. We finally got to one, then made it to Salt Lake City in time for cupcakes. Sweet Tooth Fairy. They had a sign up for Cupcake Wars flavors that was TWO MONTHS OLD - tease. Also apparently a chain out there, so Sarah equated it in her head as "Gigi's of the West and most likely overrated" (it was).

How does she stay so thin with all these cupcakes? She's a magician. Also, a lot of dancing.
Thanks to some facebook.com suggestions, we ate at a really delicious Mexican place called Red Iguana.

The Killer Mexican Food?

Our waiter really loved pronouncing the Spanish words. Made them seem more exotic. ¡Hor-cha-ta! Anyway, Salt Lake City seemed like a pretty cool place. Saw a bunch of stuff from the '02 Winter Olympics - in which we finished 2nd in medal count, BTW. By "we" I mean 'Merica. Number one? A certain nation with great policies on naming children. Keep reading...

The next morning we're off to my Aunt Melissa's house in Redstone, CO. Driving through most of Utah wasn't a lot different than driving through Nevada. Well it was a lot prettier. Stopped at this mountain lake for the girls to frolick.

They got dizzy fast.

We had lunch in this tiny little town at a drug store soda fountain. Behind the counter was an interesting book - Sweet Land of Bigamy. Of thee I sing! I was taking a picture of some weird incense "flavors" and and a dude who was working there apparently made some comment about goosing me to get me out of the way. Yeah maybe Utah is kinda weird.

At some point in the afternoon, we started talking about kids names. We don't have kids yet. Neither do the Hambones. But it's fun to think up names. We were talking about a lot of ridiculous names, gender neutral names, etc. For some reason, Carla looks up that in Germany, names not only have to be distinctly male or female, but they can't cause any type of negative effect on the child's life (Freakonomics anyone?). My response to this was, "Germany's got it goin' on." And they really do. I mean, besides that ugly period from 1933-1945. That was a pretty bad time.

Around the Colorado border, we made a little stop at Dinosaur National Park.

We totally pulled over and took this picture as we left Utah.  Tricky.

Barefoot Contessa didn't know there were dinosaurs in North America. From the visitor center, we took a half mile trolley ride up to a building they basically built over a huge mass of exposed fossils. Pretty cool. You could even touch them and stuff. For some brilliant reason, we thought it'd be fun to hike back down (someone told us there'd be some exposed fossils along the trail - there was one). About five minutes in we realize hiking in the 100 degree desert wasn't our best idea of the trip. Somehow I sweat the least... maybe because I immediately went shirtless. But also because humidity is the bane of my existence. 80 in NC and I'm soaked, 100 in the desert and nothing.

He's STILL wearing jeans, folks.  In the 100 degree desert.  (Notice one leg is hiked though.)

A few hours into Colorado and Ethan is not at all impressed with the Rockies. Even after ending up on an unpaved state highway! We get to Redstone just in time to meet my aunt for dinner at the Redstone Inn. Well Taco's got a thing against eating in hotels... but the Redstone Inn might as well have been taken straight out of the Alps. Really good food - I had trout for the first time, which I had previously avoided because it feels a bit cannibalistic. Get it? Trout - Trout Man? Jokes!

We didn't go swimming. But we did eat under those umbrellas.
Photo credit: Interweb

It was dark as we traveled up the mountain to Melissa's house. Saw lots of deer. No bears, though apparently one and her cub had been hanging out in Melissa's neighborhood. I had to assure Sarah we were off-grade enough that the bears wouldn't get in to open the window overnight (bears are excellent climbers). When we got up the next morning and looked outside, we didn't really want to keep going on our road trip. Melissa does a lot of traveling, but it was easy to see why they chose this as their home base. I just got an email from her this morning inviting us back, we're going to have to take her up on that!

Why is it called Redstone?

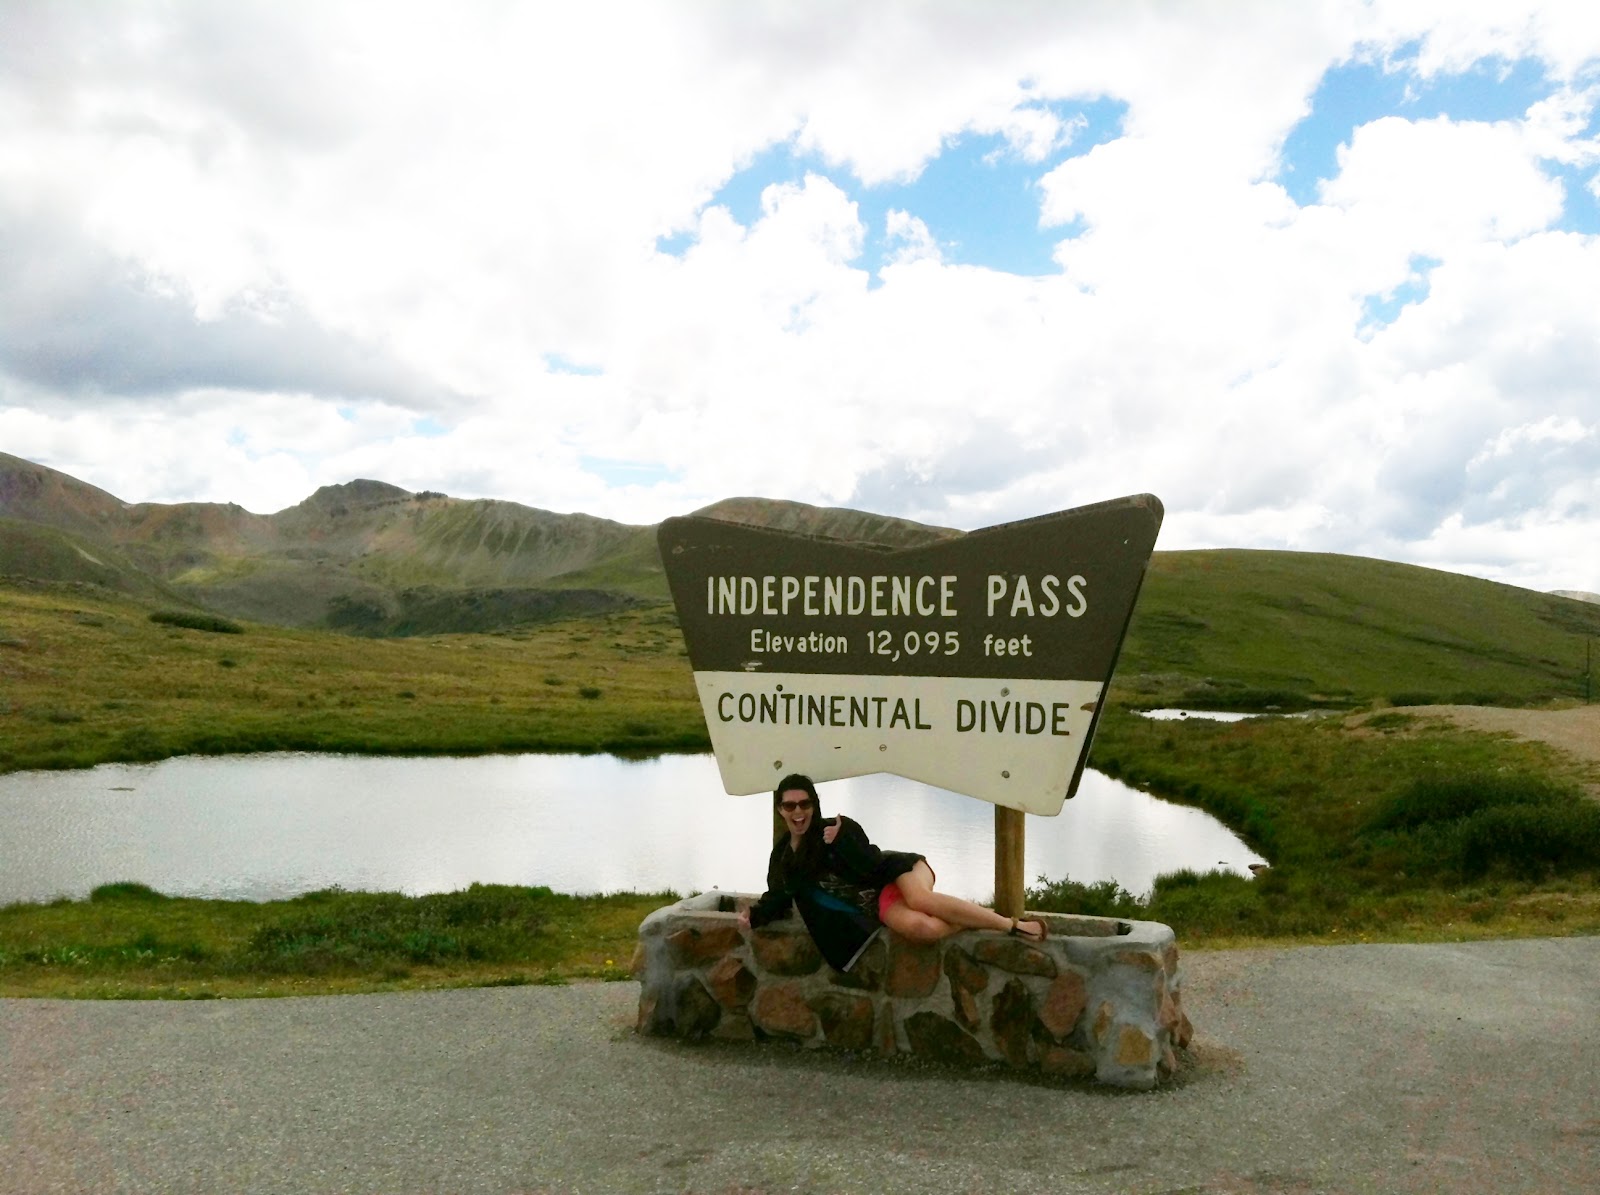
We decided to take the super long way to Denver - through a little place called Aspen. (Made an inordinate amount of Dumb & Dumber jokes while there.)  Had lunch there, and then over Independence Pass. There were no guardrails. There should have been. The views were much better than the interstate, and it was pretty cold at the top due to elevation.

The best part about this stop? Outhouses. 

After going down over 6,000ft, at the base of the Rockies, we reach the Mile High City - Denver. Denver was founded in 1858 by settlers traveling west who got to the Rocky Mountains and said, "AW HELL NO." I can see Denver being a pretty cool place, maybe we just hit the wrong places that night. Rain certainly didn't help. The next morning we hit up this place called Snooze for some breakfast.

This better be worth it.

There was a 30 minute wait. On a Thursday. At 10:00am. Either no one in Denver works, or we fell for a tourist trap. Whatever though, it was worth the wait. Before we left town though... yep. Cupcakes.


Sarah's new cupcake-bff worked at Big Fat Cupcakes, which is in no way a misnomer. We got 4 enormous ones - which contained both the best AND worst cupcakes of the trip. The worst was an orange push-pop flavored beast which didn't even get finished. The best was a chocolate cake with Andes mints melted inside and a mint icing. Much like peanut butter and chocolate, this is a good gauge of a cupcake shop. Big Fat Cupcakes hit a home run with this one.*

*Altitude makes it a lot easier to hit home runs at Coors Field, kick field goals at Mile High Stadium, etc. I'm not saying this applies to cupcake home runs, but this applies to cupcake home runs.

There is a part III to this trip.  In theory.