No, we are not naming our son Stan. In fact, Husbo and I are 99.9% settled on boy Troutman's name (first and middle!). This is huge progress for us. Are we going to share that name with anyone? No. Not til he's here. That .1% chance we'll want to change it leaves that door closed. But we're pretty proud of ourselves for choosing finally. And did I mention we completed our registries? Yup. Super parents.
Until, of course, you look at the state of his nursery:
 |
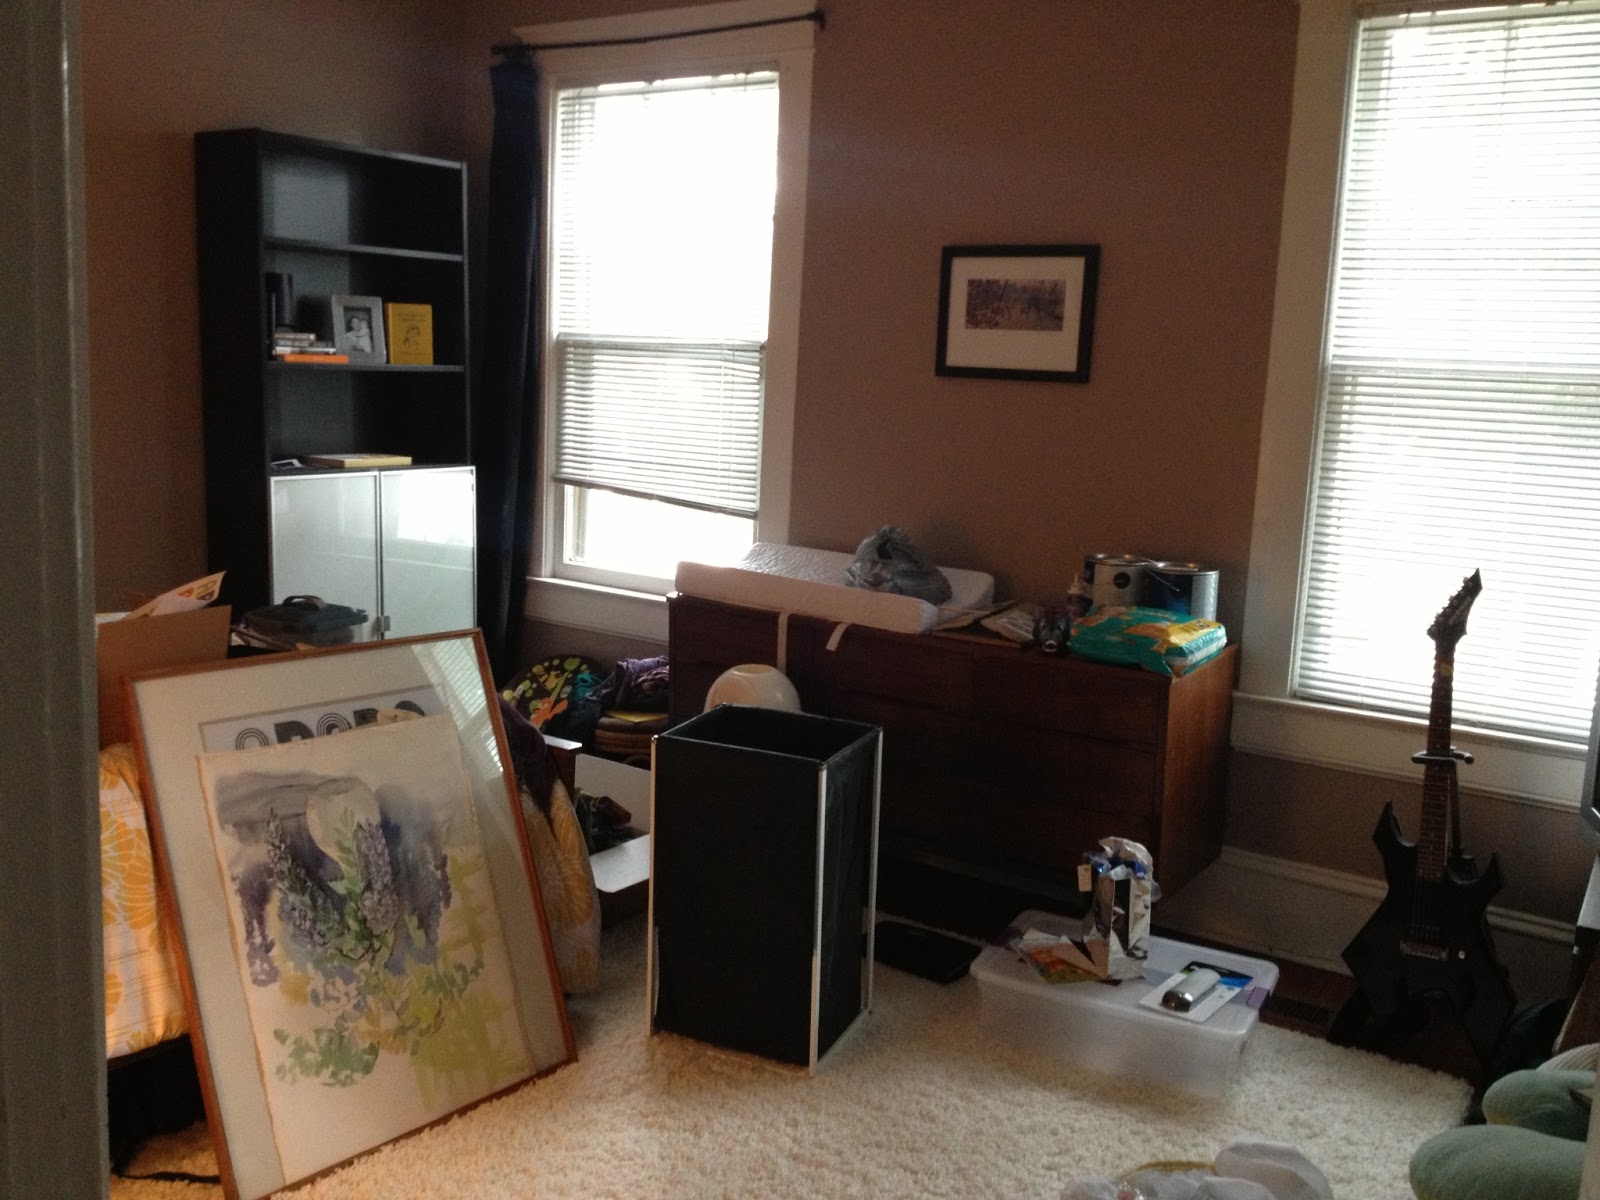
| (Image can also be found under Webster's definition for "anxiety-inducing.") |
This hot mess of a room has become the catch all for all the hand-me-downs and random junk in our house. Not exactly worthy of being called a finished room in Der Trautman Haus.
But ye of little faith...there is actually so much potential brewing in said room. The first is the general layout of the big stuff. Back when I did
the great furniture shuffle to get the office function out of his room, I also had a space plan in the works for P-Nut's digs.
And if you'll notice, a lot of that is actually in place. First, we got the bed in position and moved the bookcase into the room. We found an awesome dresser a few months ago on Craigslist that we'll be using as a changing table (after a few slight modifications). A sweet friend of ours is giving us her crib in a few weeks. The only real missing piece is that darn boob chair. Most likely, I'll be nursing wherever my heart desires (and wherever my bum is most comfy) but as he gets older, we do like the idea of having a place to read to him. If anyone is looking to get rid of a gently used
Eames Lounge for super cheap, holla atcha girl.
But the plans are there. So this post is all about the game plan. Crossing our fingers for no butt fumbles. (Google that reference if you're unfamiliar. Sorry Jets fans but it's hilarious.)
The first big decision of any room? Color. For someone who designs space for a living, this is quite possibly the most difficult to narrow down. When thinking about what I wanted the nursery to feel like, I wanted it to be obvious it was designed for a child, but avoid any type of "theme." No offense to those who go that route, it just wasn't my cup of tea. Or decaf coffee as the case has more recently been.
I've been crushing hard on navy blue for a while now. And I got to thinking (pre-finding out the gender) that I could make navy walls work no matter what the gender was by switching up the accent colors. So once we found out our baby had "outdoor plumbing," I decided on navy with spring green accents.
 |
Mr. Valspar, if you're reading, I'll be happy to be endorsed for this plug.
|
The actual colors we (or let's be honest, I) chose: 4009-4 Fly-by-Night Blue for the walls, 6006-5 Tempered Sage for the ceiling (the forgotten canvas) and 7006-24 Ultra White for the stencil wall that I have yet to mention.
Nick's very sweet dad (or "Pippy" as we're hoping he'll one day be called) has offered to do the painting job for us so that should be getting underway soon. Why paint the ceiling, you ask? Well firstly...everyone always forgets about the ceiling. Every room has 6 surfaces to consider: 4 walls, a floor and a ceiling. If we owned our home, I'd probably do something a bit more elaborate. But all things considered, paint would be quite spiffy. One quick tip: any color on a ceiling will read MUCH darker when installed than it does on a chip. So be wary of picking anything too dark unless that's the vibe you're trying to lay down.
The other reason to paint the ceiling?
The grody damage around the boob light. I'm guessing there was a ceiling fan installed in the room at some point. I feel like our kid is going to spend a lot of time staring at the ceiling and I don't want him to get a complex with this horrible breast light staring back at him. So that'll be replaced too. The very sweet Bemily generously picked up this fabulously simple light at Ikea.
 |
| You better WORK it, Alang. |
Other items to be addressed:
Window treatments. This is the current sad state of the room:
Cheap black curtain rod with some heavy black velvet curtains I made about 8 years ago. They are great for blocking out light but with dark navy walls in our future, it would feel a bit too cave like in there. So I'm thinking I'll be switching those out to something bright and white. It may just be a solid white curtain depending on how pattern-heavy I feel like things are getting. One of the things I alluded to earlier was the addition of a stenciled feature wall in the space.
Like every breathing woman on earth, I too have been perusing Pinterest for inspiration.
This amazeballs herringbone pattern makes my heart skip a beat.
 |
| Don't get used to high quality images on this site. Grainy iPhone pics 4 life! |
And how baller does the white and navy look together? Quite baller is the answer.
Another DIY project we'll be tackling?
I spy with my little eye: a kick ass atomic style mobile. So after about 5 minutes of brainstorming in AC Moore, we came home with this pile of potential:
If it turns out awesome, I'll write up a little tutorial. If it turns out looking like a 2nd grader's failed science project depicting the solar system (long live Pluto!), let's pretend I never mentioned it.
And what's that giant thing leaning against the bed?
After doing some re-design at my parents' rental beach house, this yard sale artwork came home with moi. The watercolor flower motif wasn't working at the coast and it really wasn't working in Casa de Troutman either. But the frame and mat were working it like a boss.
So out came the flowers and in goes a custom graphic by the future Dad of the house. You can see a little sneak peak of a black and white test print we did to make sure we liked the scale. Stay tuned, suckas.
And rounding out the list: upgrading some of our existing stuff to blend in with the new baby-fab motif.
 |
| I'm thinking this guy gets painted white with a bright blue back wall. |
 |
These lamps and side tables are either getting replaced entirely or changed dramatically. Either way, nobody is safe. Including you, crazy yellow comforter.
|
We still have a few things we're trying to unload on Craigslist so I'm hoping to clear out a bit of the mess this week. I'm pretty excited to see it start coming together. I'm able to visualize it in my head but there are still a number of question marks I won't be able to settle on until I see the room develop. We've got 11 weeks 'til life changes forever so I'm hoping this nesting instinct helps motivate me to tackle everything sooner rather than later. Lord knows I won't have the energy once he's here.
 |
| And no, I don't watch Modern Family. Haters gonna hate. |