Perhaps the title is a bit overstated. But we did make a mobile.
Sarah had seen
this mobile that she liked, and we decided to do our own modified version of it. We really like the whole mid-century vibe, so the
atomic ball thing seemed like a great idea. A continuous thanks to everyone in Raleigh who keeps tearing down the few mid-century houses in town to put up your McMansion!
So here was the actual inspiration, from her Pinterest board. Whatever that is.
This one was apparently made using a pre-bought picture mobile frame and then attaching Christmas ornaments to the ends. Well, guess what? It's July. Good luck finding those. Plus, we're creative people...we could figure out another solution. So we went to AC Moore for about 20 minutes and brainstormed. (It was a nice little Saturday.)
The supplies were surprisingly cheap:
- a 2.5" diameter wood ball for the center
- four 36" long x 3/16" diameter rods
- (1) pack of (18) 1/2" diameter balls for the ends
- wood glue
- fishing wire
Total came to about $12.
Sarah marked spots on the center ball where I was going to drill holes for the rods to come out. I had also purchased a 1/4" bolt to attach the ball to a scrap piece of wood to hold it in place while I drilled these holes.
 |
| Look closely and you can see her marks, which she assures me are not "willy nilly." |
And then I drilled in pilot holes about 1/4"-1/2" deep.
 |
| One hole down. |
While I did this (and clearly, after she'd taken the above pictures), Sarah was marking the rods into random lengths for me to cut next.
 |
| Also, apparently, not willy nilly lengths. |
Then I just wood glued them into the previously mentioned holes.
 |
| Check out the socks, hitched up due to the insane amount of mosquitoes outside. |
Structure complete! (For reference, all of this took about 45 minutes in total. Including pee breaks. Three, to be specific.)
Then it was time to paint the structure white. And let me tell you - 3/16" diameter rods sticking out at random lengths make for a fairly delicate structure. I bet you're wondering how I managed to put it all together and apply several coats of spray paint without breaking it! Well, I never said I didn't break it. I actually only broke off one rod when I got too close with the spray paint and knocked it off the ledge it was on. I don't think the fall itself would've broken it. My trying to catch it did. After struggling a bit with how to fix this (note: tape isn't going to work), I cut off the little broken piece still glued in very close to the ball. Then I whittled, yeah - that's pretty much what it was, out the remaining bit from inside the ball. Well, enough to sharpen the broken end of the rod and jam it in there. It worked, and you can't tell which one it was.
While I was out somewhere, probably playing a
show or
working out if it was a weekend, Sarah took over. She ripped out pages from what appears to be a Victoria's Secret catalog to work inside, because it was July in NC and that means it was hot and really muggy and she is retaining water "like a friggin' camel" (her words, not mine). First she glued the smaller wooden balls to the ends of the rods.
 |
| Maybe it was a Coldwater Creek catalog? That's definitely not something I should know about at all. |
That pack of balls we bought for the end had holes pre-drilled AND at the right diameter for the rods, but the holes went all the way through. And yes, I'm laughing every time I say balls, but I don't really have many other options here... should I have been calling them atoms? Protons and electrons? Nuclei? Balls it is! Being the master crafter she is, she filled the ends with wood
puddy putty.
Time to paint the balls. Because there is a lot of crafting/artwork done in our house, there was already a lot of little bottles of paint around, and we wanted to try to match the colors in the alphabet print.
 |
| Rods were taped off at the end so as to make painting the colors way easier. |
 |
| All end balls painted. |
Apparently each color needed two coats to get a nice saturated look. But once it was all painted and dried, Sarah gave it a layer of sealer to give it a finished look.
 |
| Had this on hand, too. B/c my wife is a craft hoarder. |
And all that was left to do was hang it! This took several weeks, because we had to do stuff like get the crib in place and continue living our fairly busy lives. I do realize the irony of calling our lives busy when our kid isn't even here yet. But as many of you know, we had not one, but two plumbing incidents (one semi-major) in the house that took priority over the mobile.
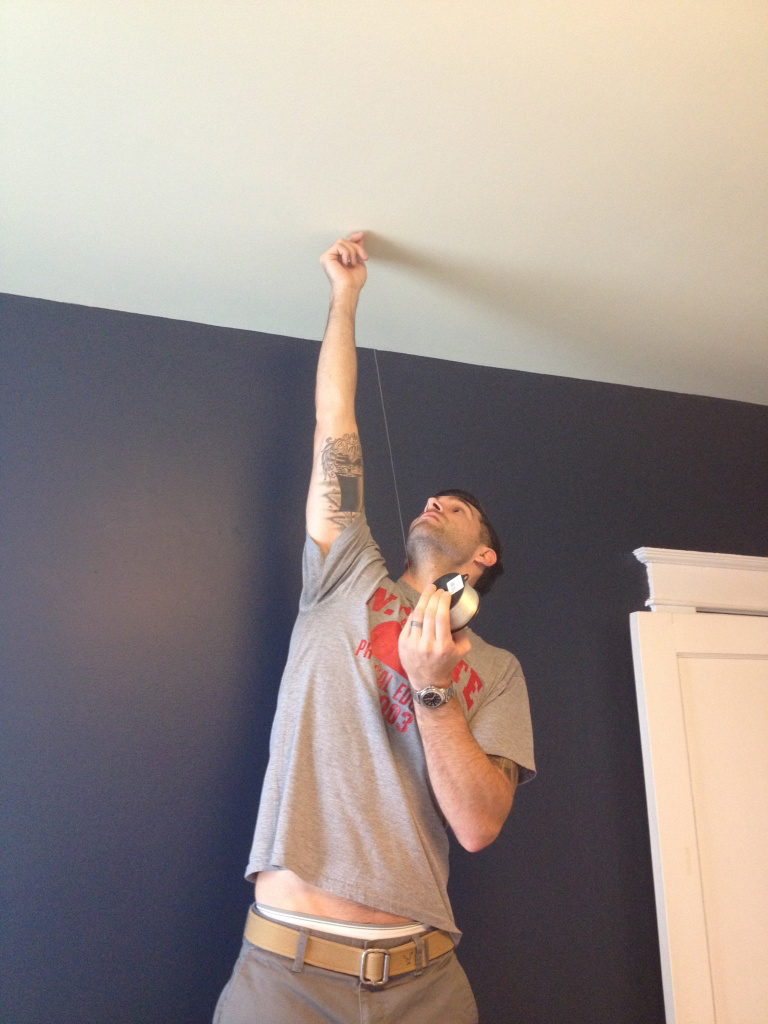
We wanted it centered on the door as you walk in, and over the crib, so while I stood on a chair, Sarah told me where to screw the hook into the ceiling. I had already attached some 40lb test fishing line to this hook. After cutting the fishing line to a workable length, we got the mobile to a good height and I tied about 50 knots to hold it in place.
 |
| Belly shot! |
And that was it! Our awesome
ballsy atomic mobile was done!
 |
| Camera 1. |
 |
| Camera 2. |
Looks pretty good, if you ask me. Sarah likes it most because nobody else has one like it. She must be a hipster deep down. It was nice to make something special just for our little dude. One day I'll tell him about how we did it and we'll be all:
 |
| He'll be so impressed. |


No comments:
Post a Comment